Compass, Dividers, and Straightedge
Note
This book is not anywhere close to complete. For more on its status, please see Status of this Book. Please enjoy this preview as it grows, and if you have feedback, send it to simonstl@simonstl.com.
Not all tools shape the wood. Many critical tools simply help you decide where to cut.
You probably remember the compass and straightedge from geometry classes, and you may have encountered dividers ("those funny compasses that don’t draw") in mechanical drawing or navigation. In a world obsessed with measurements, it may seem strange to lay out your projects with such simple tools. These tools step back from the precision we expect of our machines, but they offer their own rewards.
Using the compass and straightedge will help you test ideas on paper, while using dividers will help you transfer those proportions to the reality of the pieces you build. While you can get caught up in the beauty of geometry itself, you’ll likely find that the geometry changes - and improves - the shapes of the things you create.
The compass frequently works on neat re-use of the same measurement, while the dividers work with a more trial-and-error approach.
Choosing a Compass, Dividers, and Straightedge
You probably already have a straightedge, typically a ruler, around. If you don’t have one and go shopping for one, consider choosing one that’s easy to pick up. Triangular scales are really convenient that way, and I use a $2 "finger grip ruler". You don’t need to get very fancy. Machinist’s rules are nice, but more than you probably need.
A compass and dividers are trickier. In both cases, you’ll want it to balance being adjustable with holding its position once set. One compass is fine. Over time you may want multiple dividers set at different measurements, but one is fine as a start.
Figure 7-1 shows a wide range of compass types. You can use a classic $2 school compass, if the hinge stays in place and the point is sharp. (Recent compasses seem to have "safety blunt tips" that can work on paper but will slide on wood.) You can use a fancy drafting compass if you like the way it feels. Adjustment wheels make it easier to be precise, but they also generally make it slower. Trammel points on a ruler can help you make large circles, but they can be tricky for precision work. If you find yourself battling to keep the hinge or pencil in place, get another compass. The more complex the project, the more important it is for the compass to keep its setting.
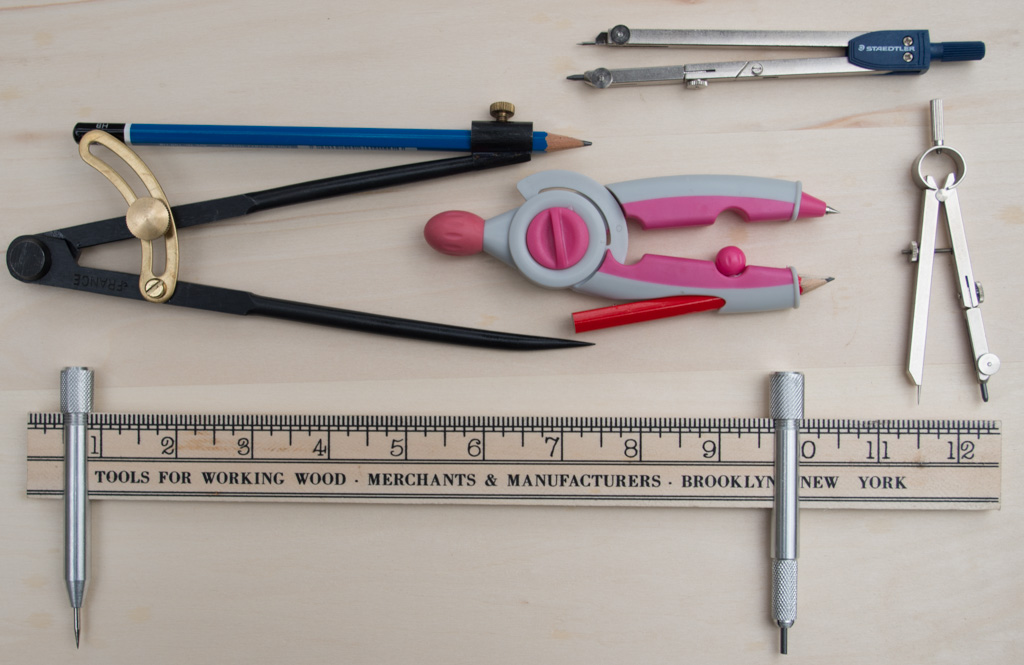
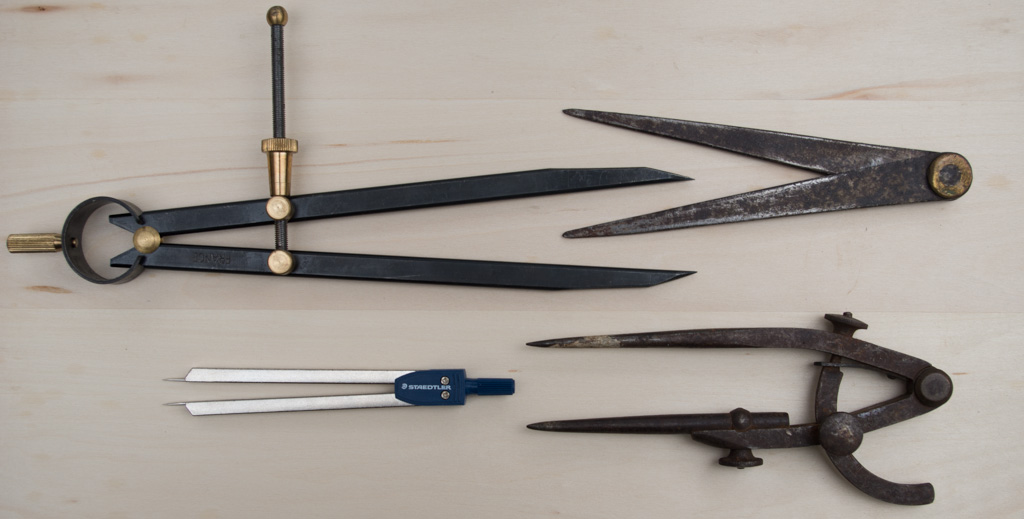
Figure 7-2 shows a variety of different dividers, all of which work. For woodworking, you probably want to have dividers that are six to eight inches long. Drafting sets often include dividers as well as compasses. Those dividers in particular may be small and too easy to change, but they can get you started. You’ll want your dividers to adjust quickly and hold a measurement. Some dividers just have a hinge set to the right amount of friction: enough that it takes a strong pull or push to change it. Others have wheels for precision. Wing dividers let you loosen a screw, adjust the spread, and then tighten the screw again. You’ll want points that can leave marks the wood, marks you can use to set your tools.
For both of these tools, used is fine - indeed, odds are good that used tools are better. A search on eBay for "drafting tools" brings up all kinds of good things.
If you’re feeling expansive or just want to work through some common situations quickly, you can go further. You can supplement this basic kit with a protractor for measuring angles, triangle templates (typically 90-60-30 or 90 with two 45s), and a self-healing cutting pad. If you’re especially fond of mechanical drawing, you can get (or perhaps already have) a drafting table, T-square, and more, but you don’t need them for this work.
Note
If angle calculations aren’t your thing - it may have been a long while - you may want to explore Common Angles and Their Uses. You don’t need to deal with numbers for this chapter, though.
Using a Compass
If it’s been a while since you’ve used a compass (or if you never really did), it makes sense to work through some basic exercises to get started. Fortunately, the exercises are for tasks that can actually be useful in your woodworking projects. At first, it makes more sense to practice on paper, but you certainly can apply these techniques on wood as well. (You’ll do that in both Carving a Geometric Border and Carving a Rosette.)
Before you start, make sure the points of the compass are sharp. The spike should go into the drawing surface to secure it, and the pencil should have a sharp point for cleaner lines and more precise intersections. (If you use a compass with a small sharp spike and shoulders, you can often make the hole from the spike disappear by placing a drop of water on it. The wood will absorb the water and swell, filling the hole.)
Note
You don’t need to pull out a compass every time you create a circle. I suspect that a survey of the world’s furniture would find many delightful curves based on the diameters of local coins, cans, or washers.
Drawing a circle
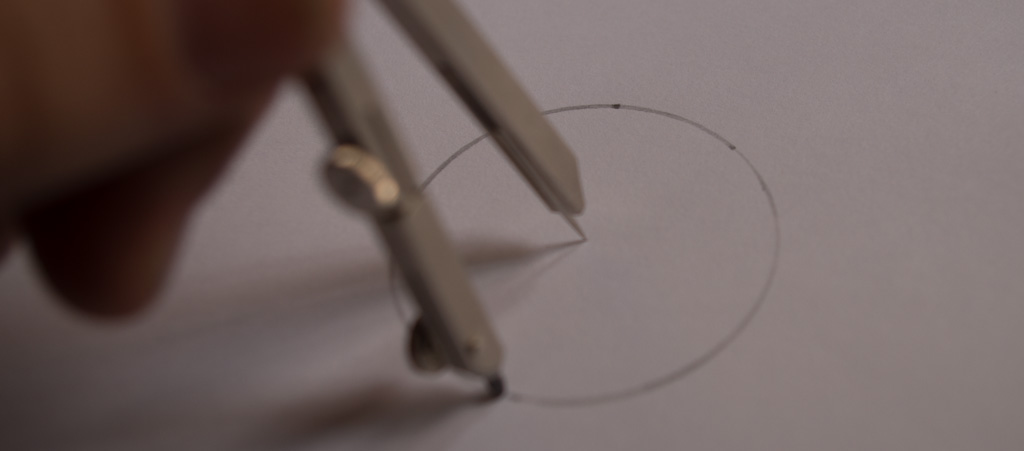
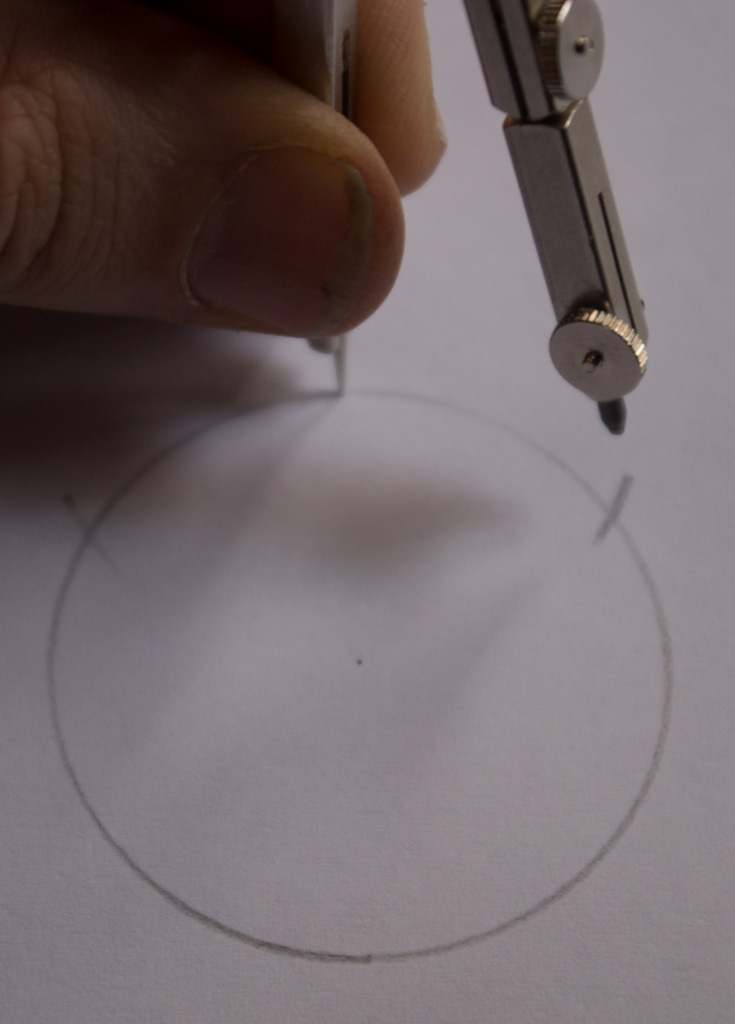
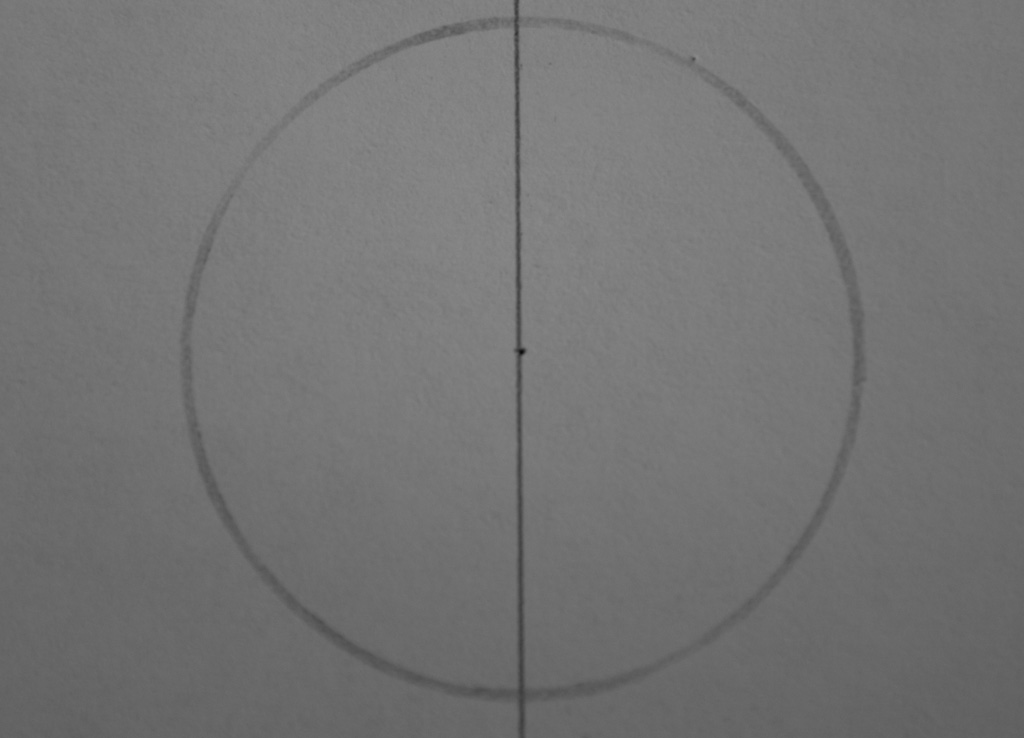
The fundamental operation a compass performs is drawing a circle. Even when you draw an arc, a fragment of a circle, the skills are the same as those for drawing a circle. Circle drawing is also a good test of whether your tools and techniques are working. You can draw a lot of arcs before realizing that the radius of the circle has changed. If you draw a circle and the end doesn’t line up with the beginning, you know there’s a problem.
To draw a circle, set the points so that the distance between them is the radius of the circle you want to draw. The radius is half the diameter - if you want a circle that’s four inches wide, set the points two inches apart.
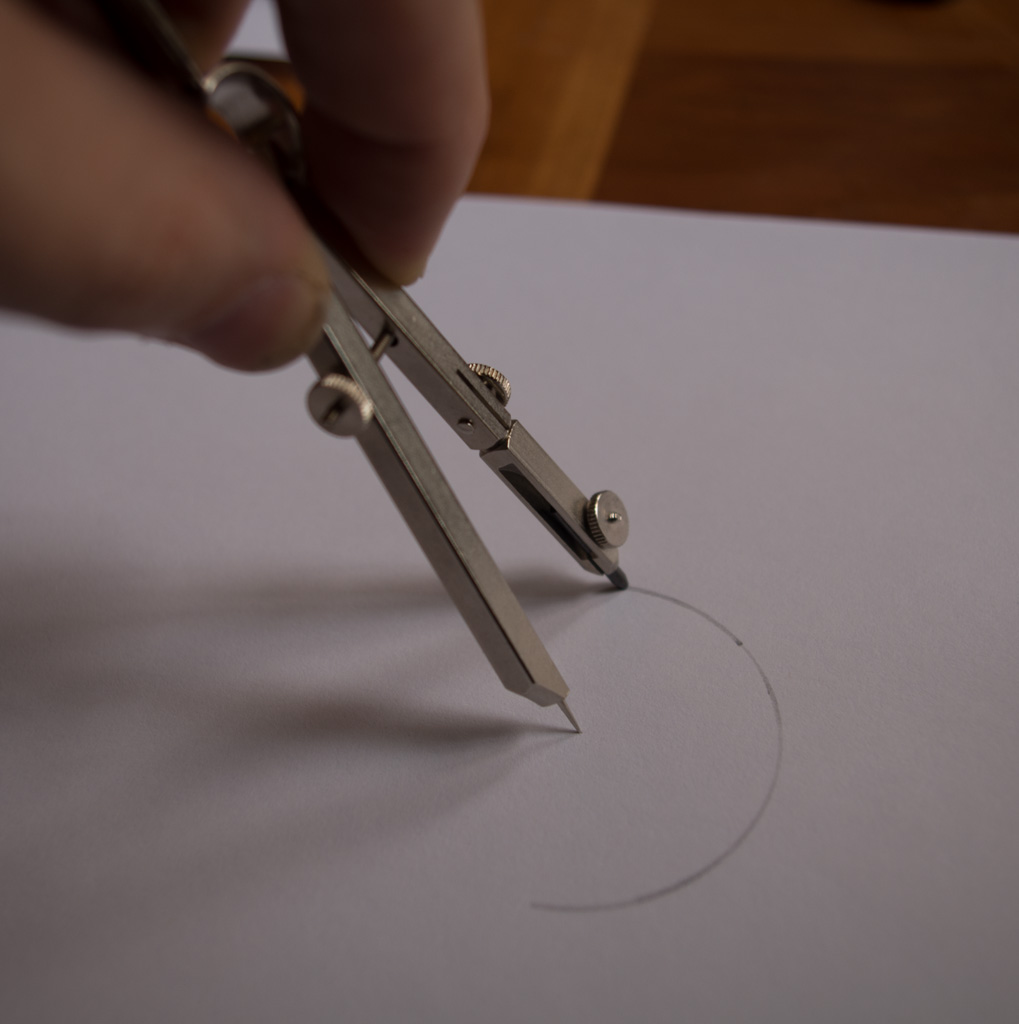
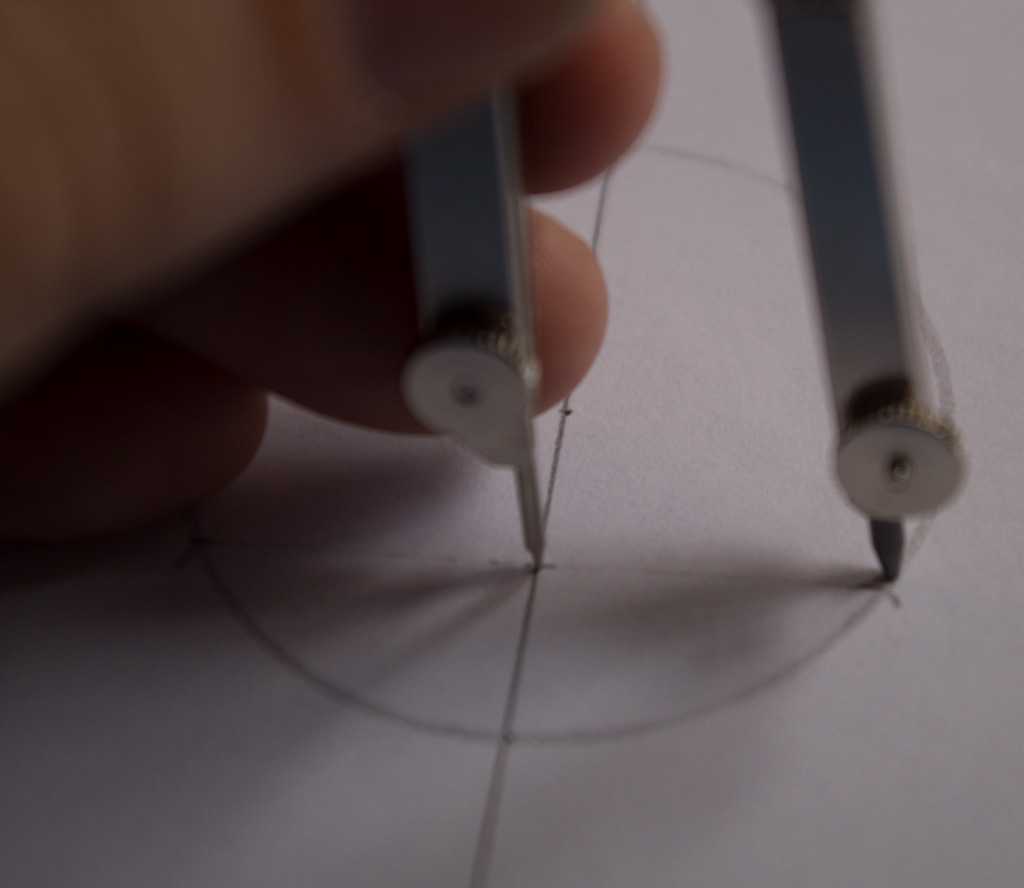
You’ll want to hold the compass at the top, tilting it slightly so that you don’t have to push as hard on it to get to go around. I find it easier to have the weight mostly on the point, with just enough pressure on the pencil to make it write. Despite the frequent appearance of a round handle at the top, just twirling the compass doesn’t work very well.
To get started, just draw some concentric (nested) circles of different sizes, as shown in ???. Draw a circle on a piece of paper, and then set the compass to a larger or smaller setting to change the radius. Use the same centerpoint for all of the circles. Study your lines - are they smooth? - and the intersections - are they neat? - to see if your technique (and tool) are working.
Note
You can get compasses in this style up to around 16 inches, producing a 32-inch diameter circle. If you need to make larger circles, look into beam compasses or trammel points.
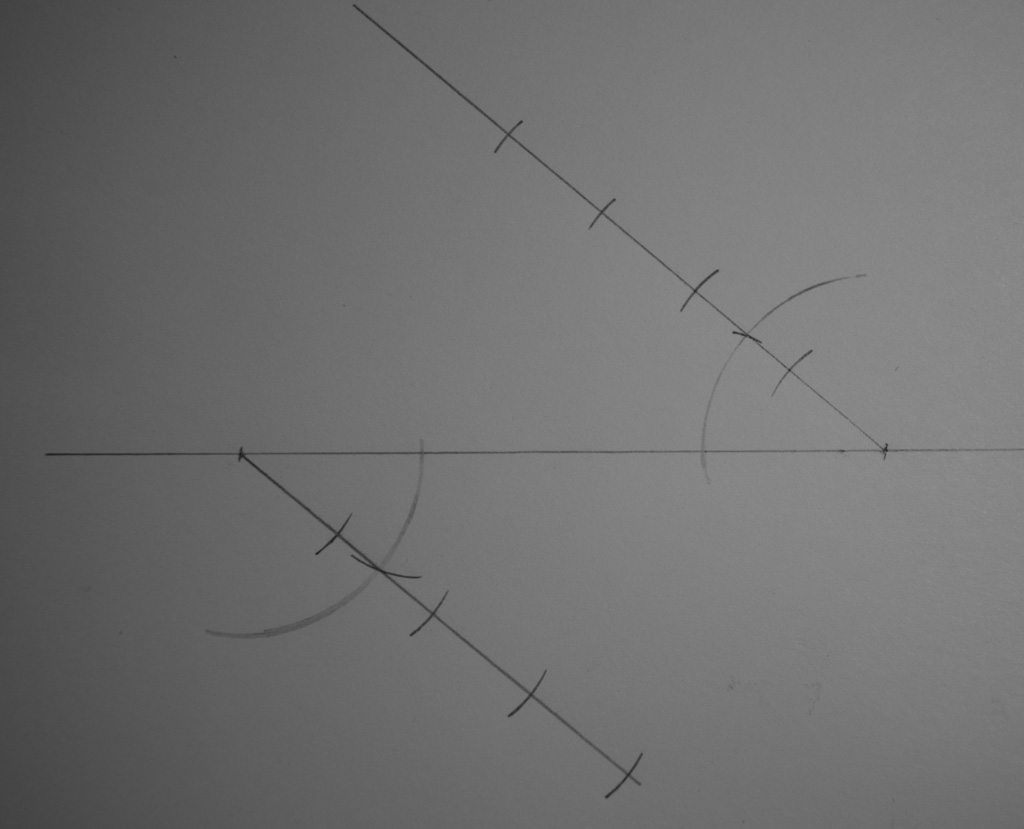
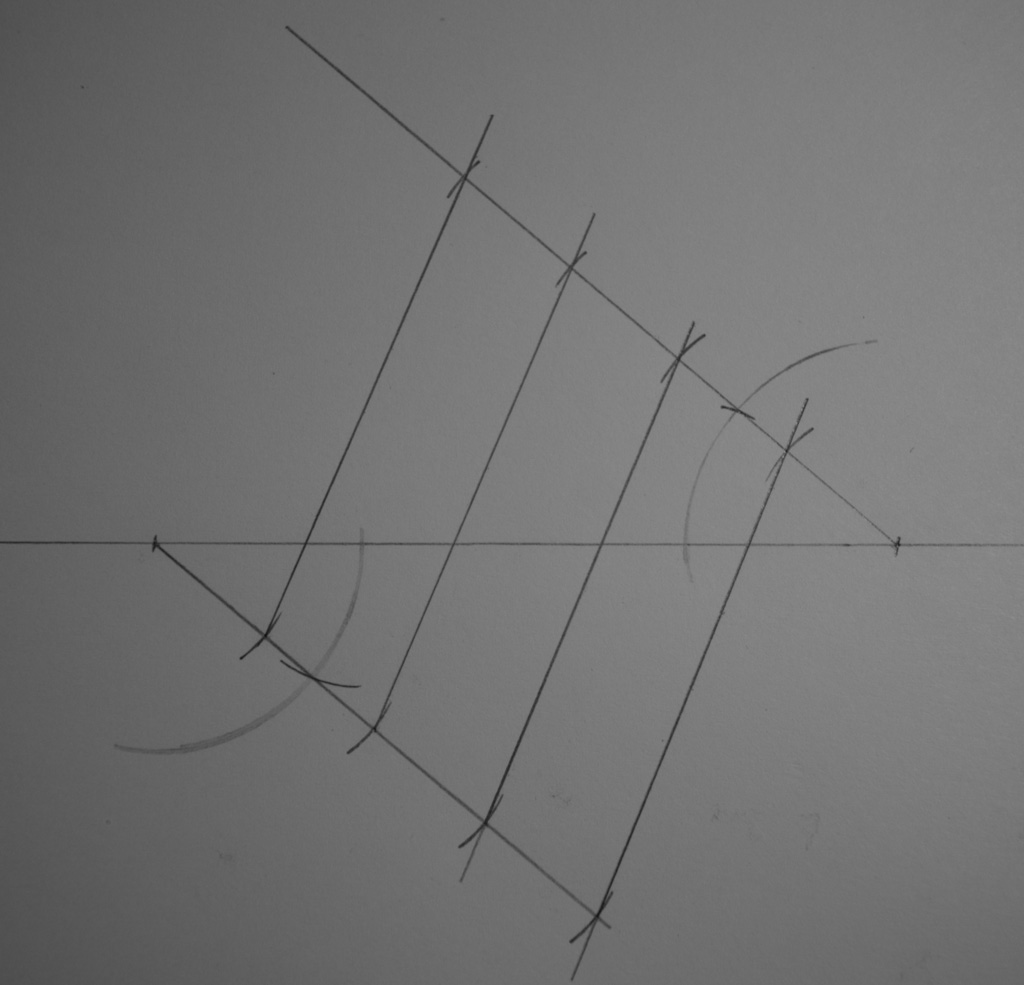
Creating a parallel line
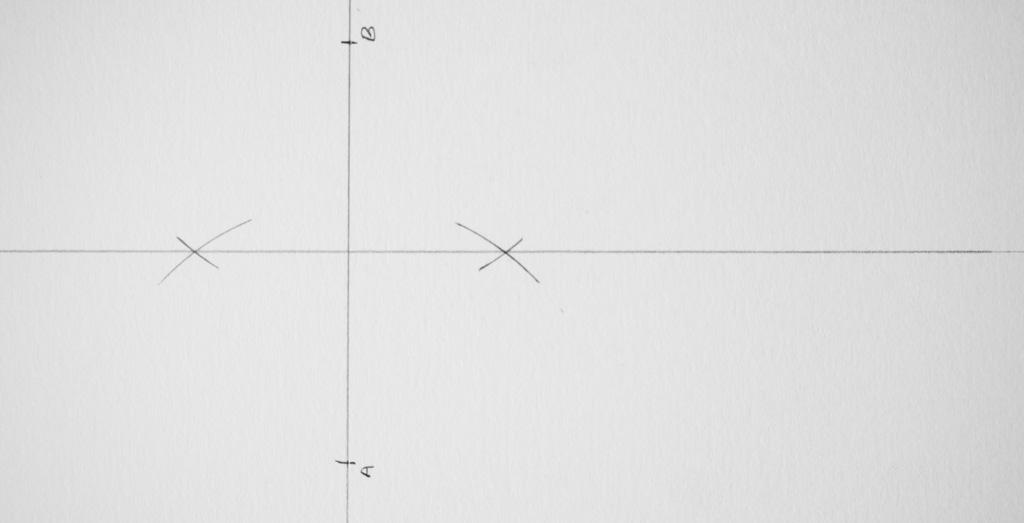
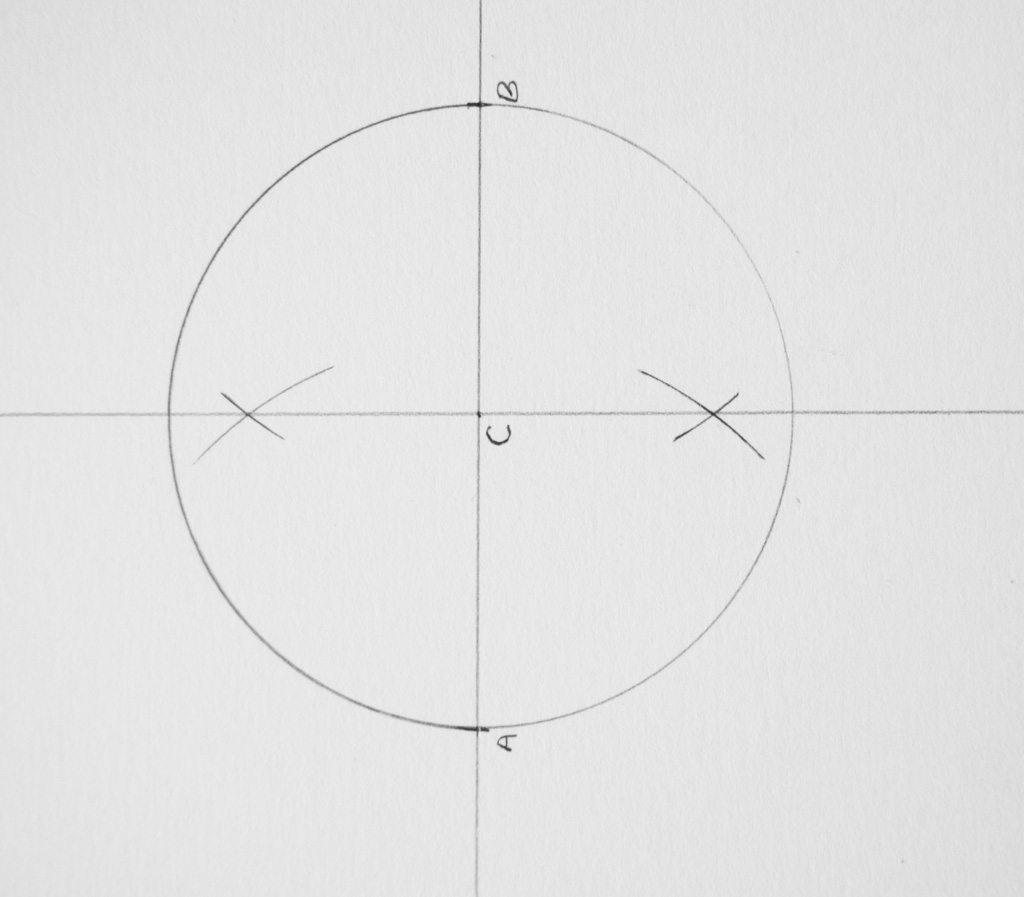
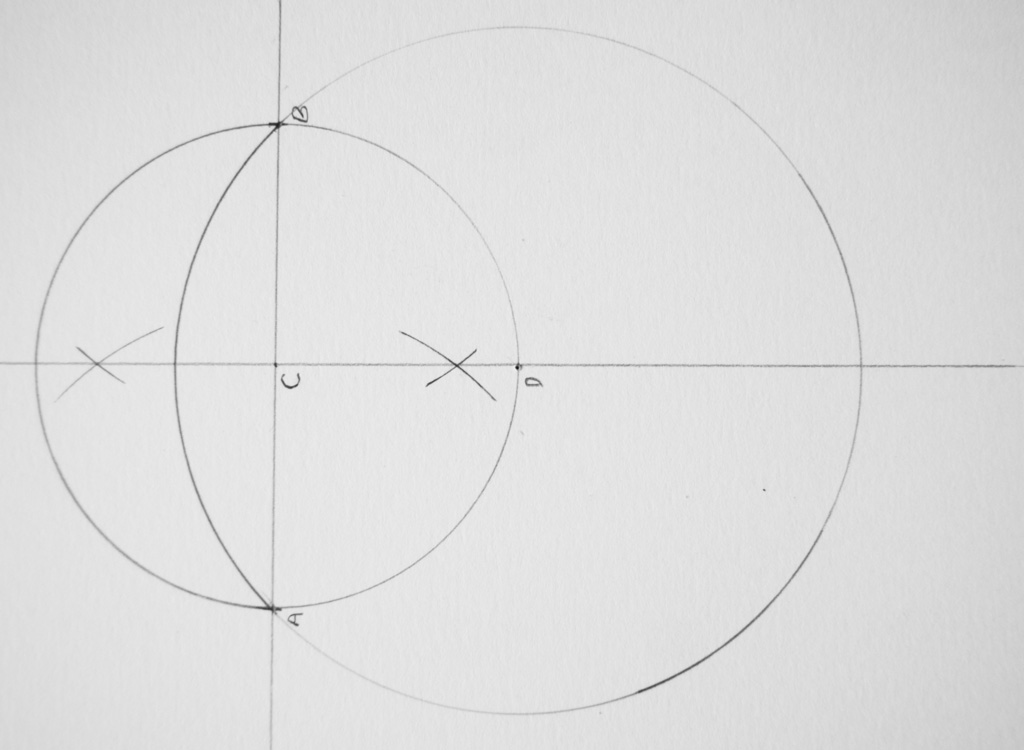
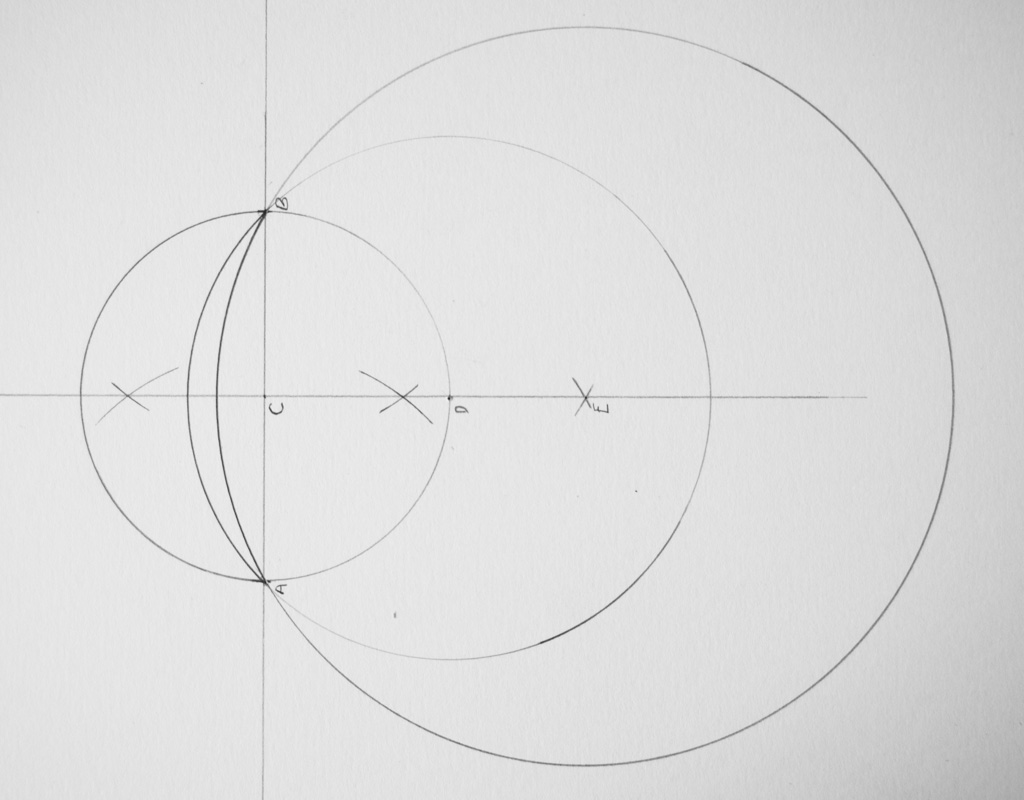
Once you can reliably draw circles, it’s time to use the compass to construct other geometric forms. Parallel lines, lines that stay at an equal distance, are extremely useful, whether you’re drawing a project on paper or laying out a border on wood.


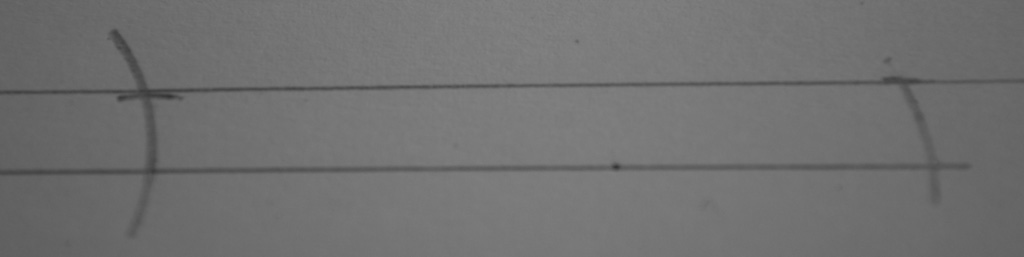
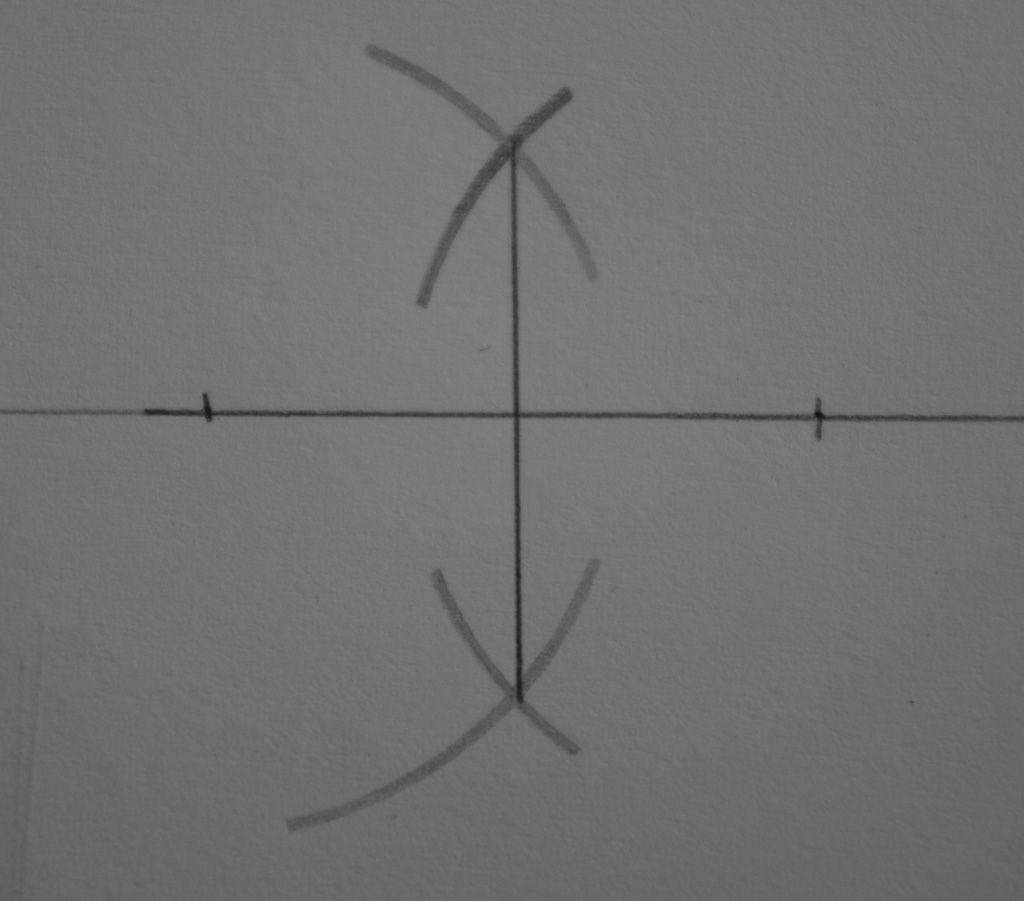
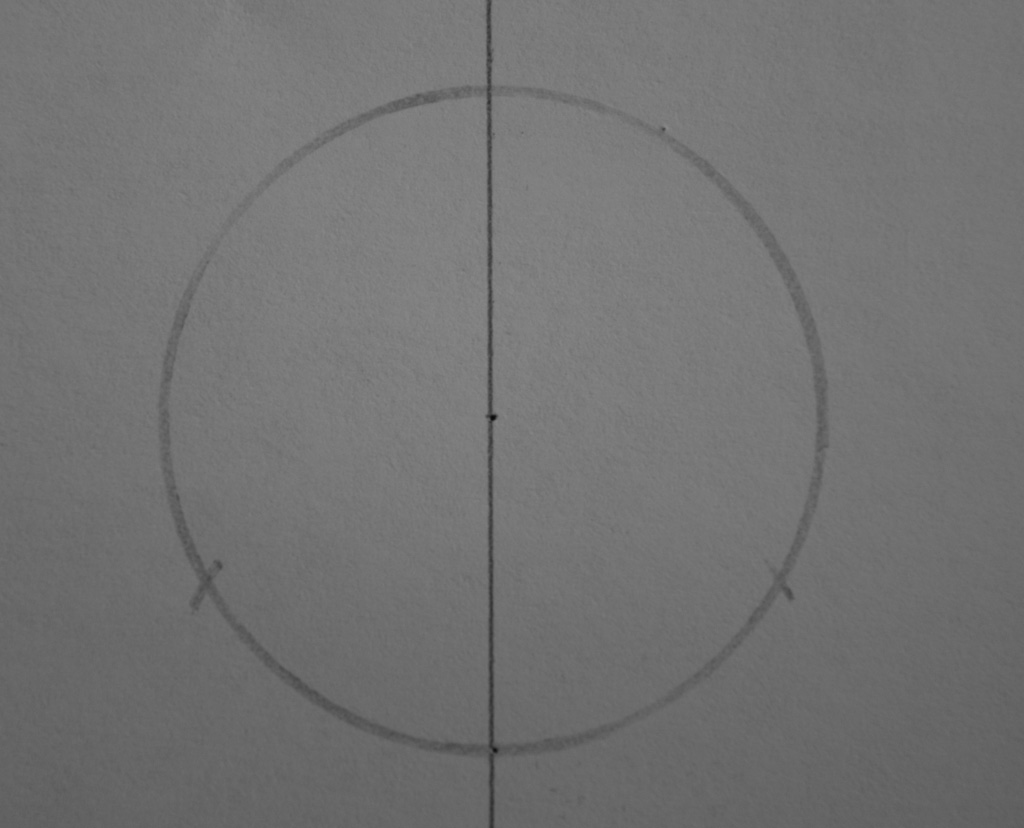
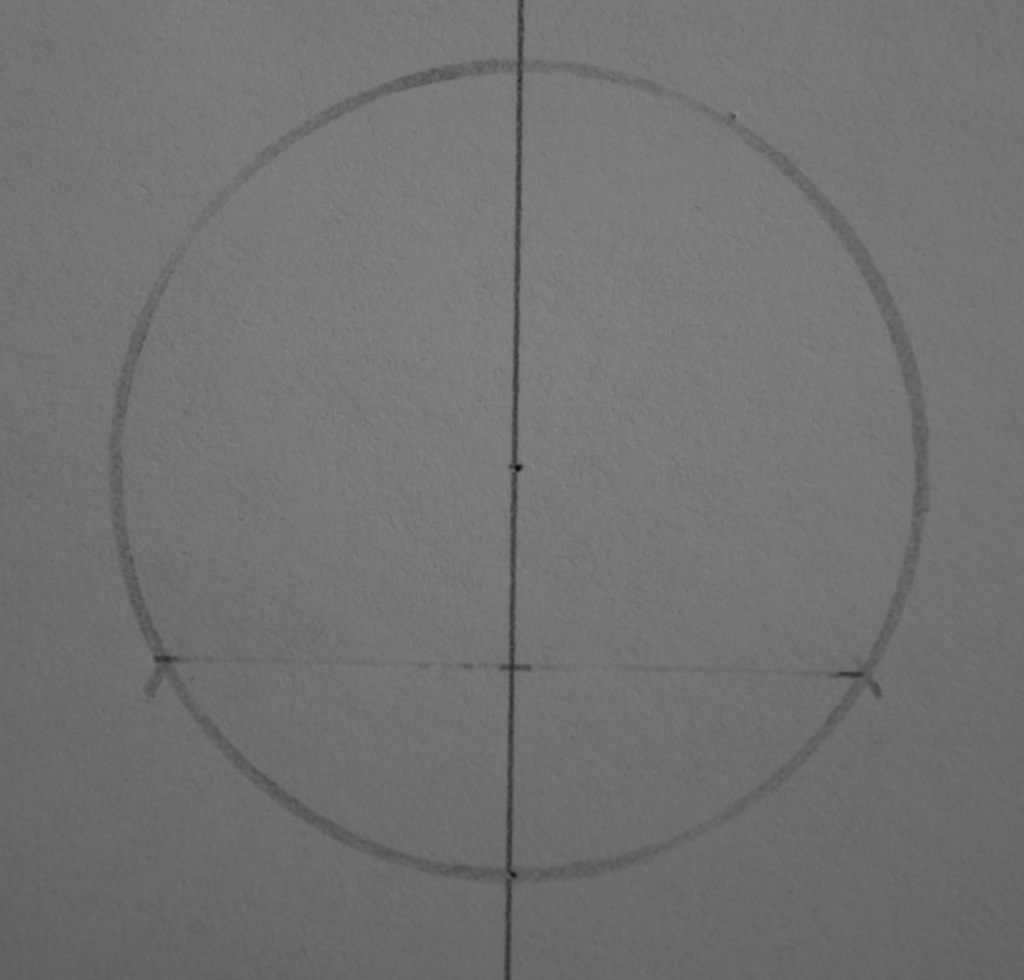
Creating a perpendicular line
Bisect: two arcs but if you don’t have room…
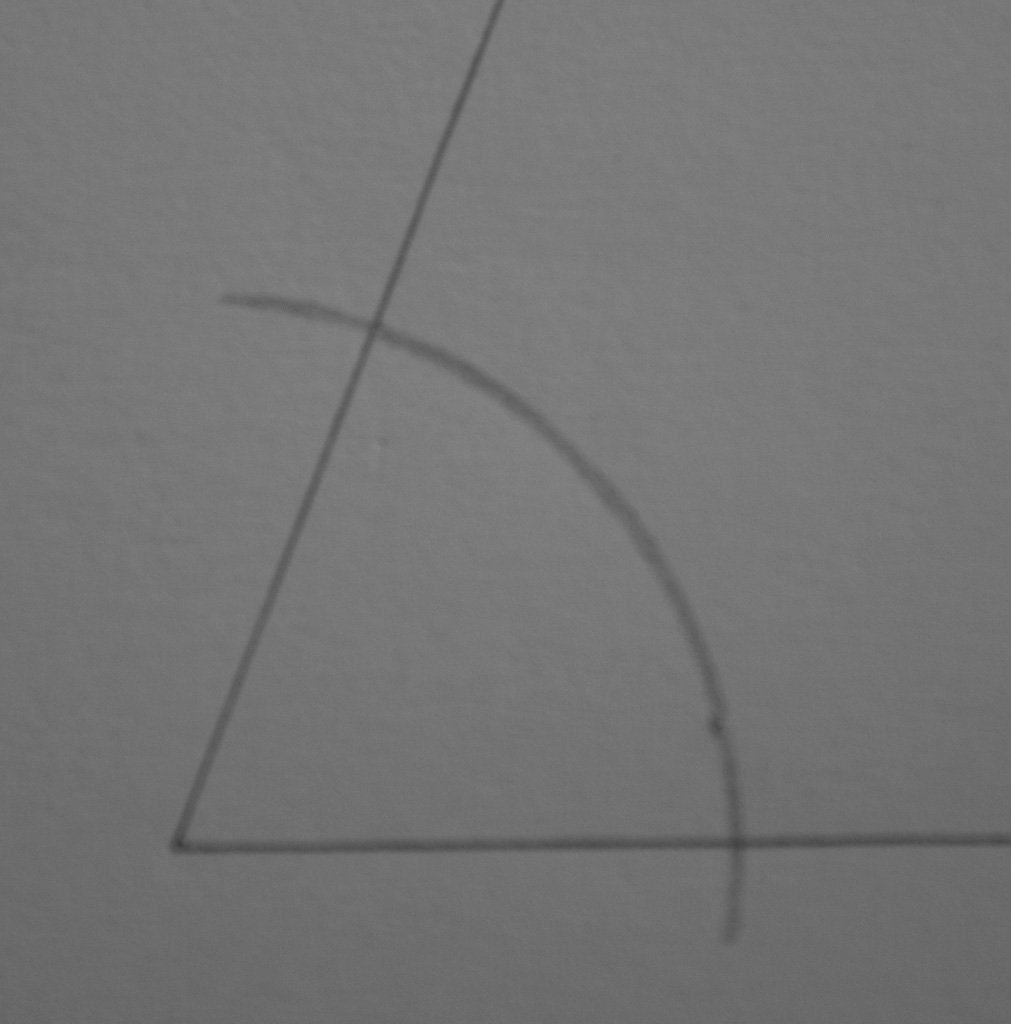
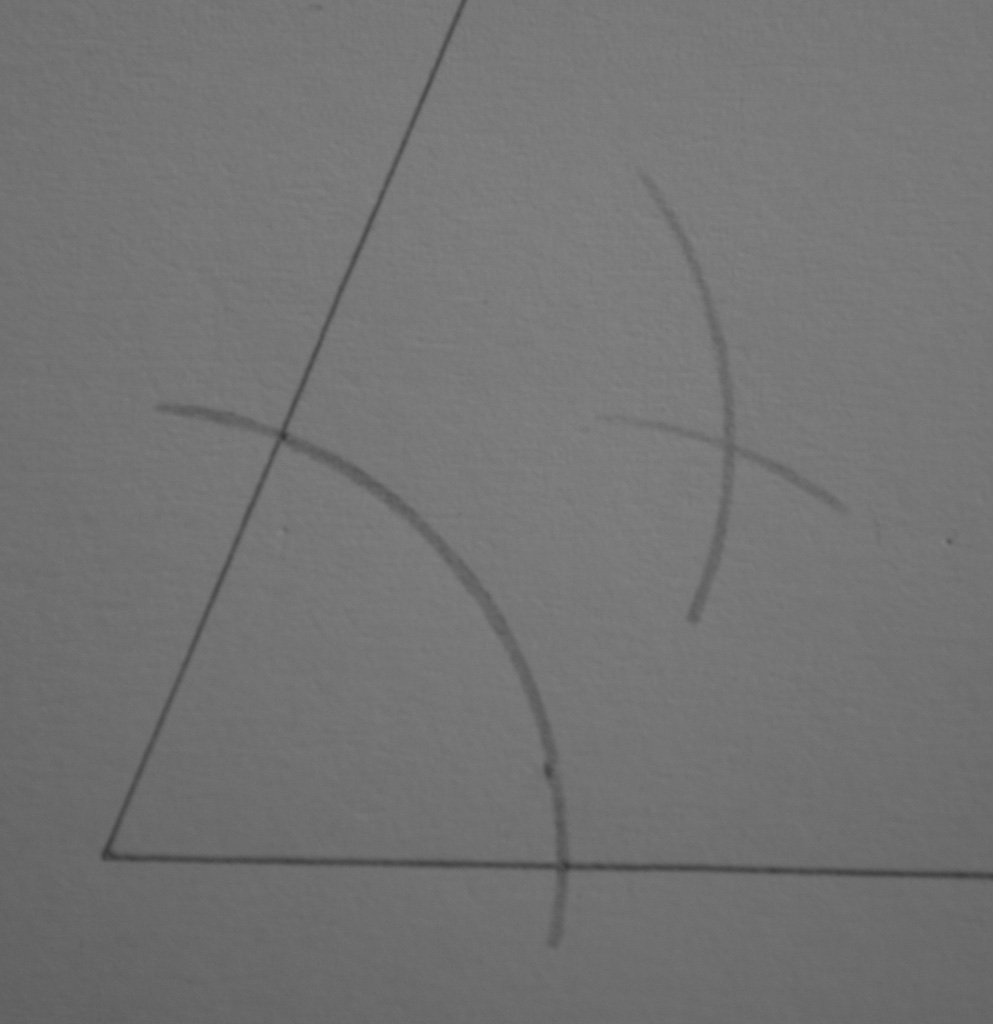
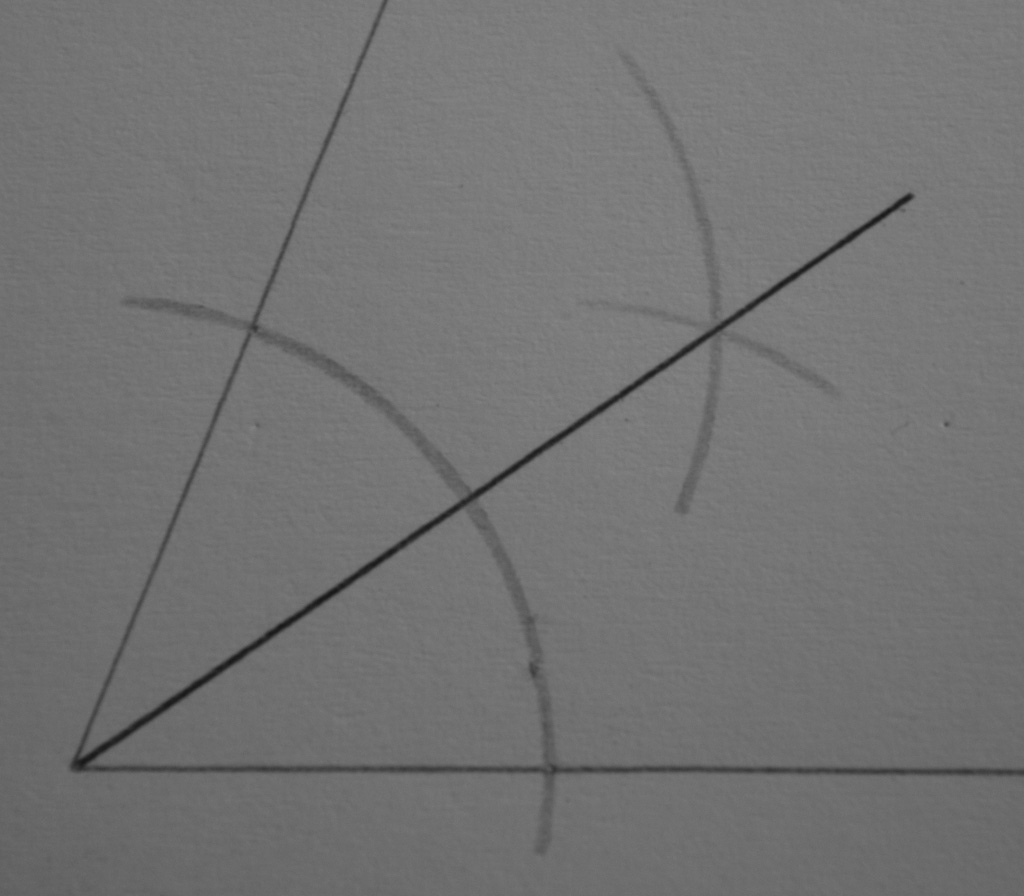
Bisecting an angle
Bisecting an angle isn’t just an academic exercise - it’s something you can probably find in furniture all over your house (or at least your neighborhood). A miter joint is a nice way to blend the grain of wood and avoid an obvious visual collision between horizontal and vertical lines. Typically the angle in question is a right angle, 90 degrees, and the split is into two 45-degree angles. All kinds of devices, from plastic triangles to miter boxes, will help you create a 45-degree angle - but not everything uses right angles.
If you need to split a different angle, this approach may help you.
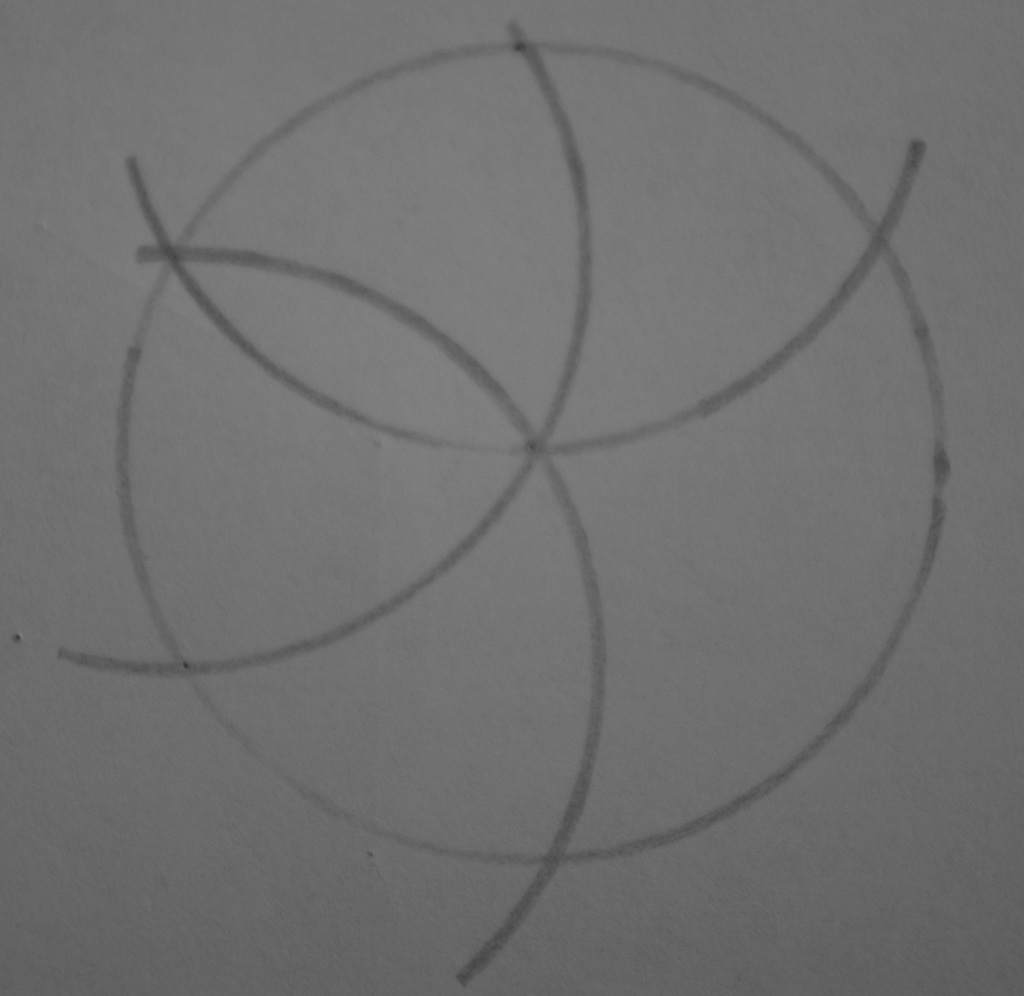
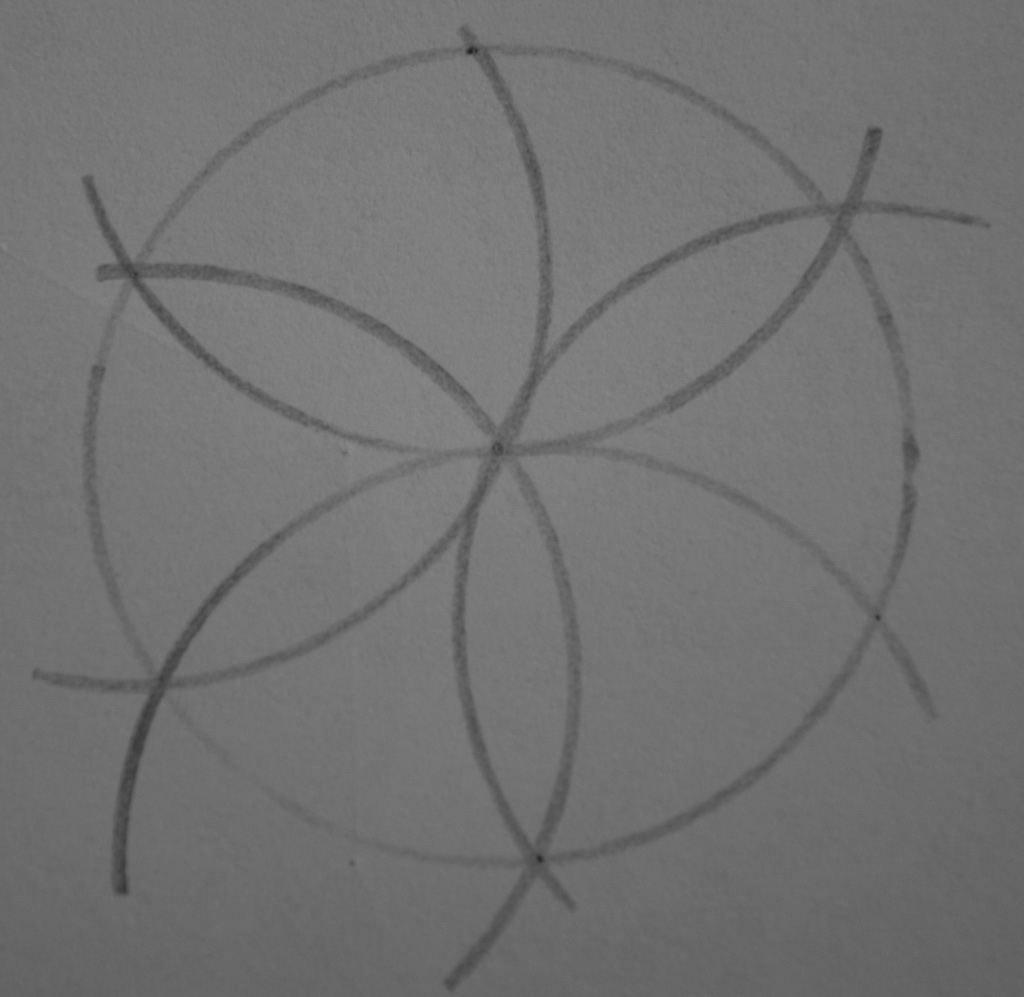
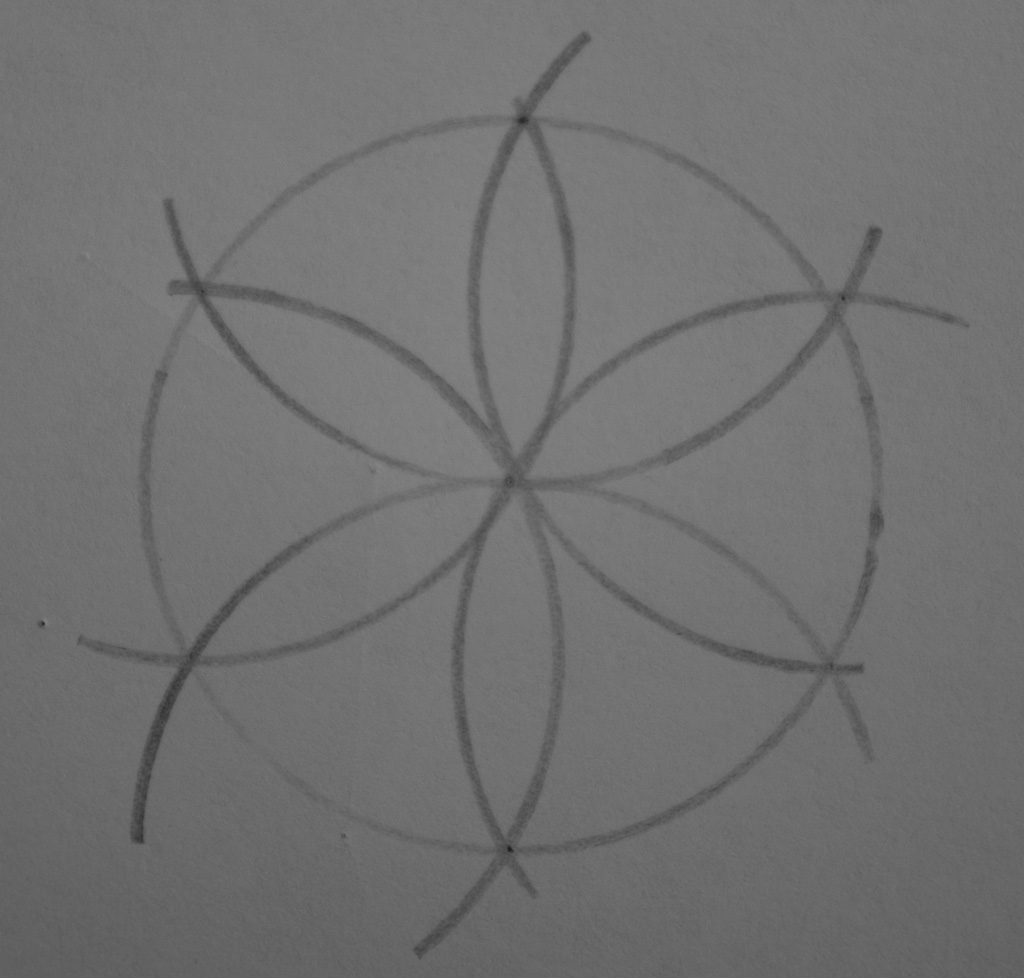
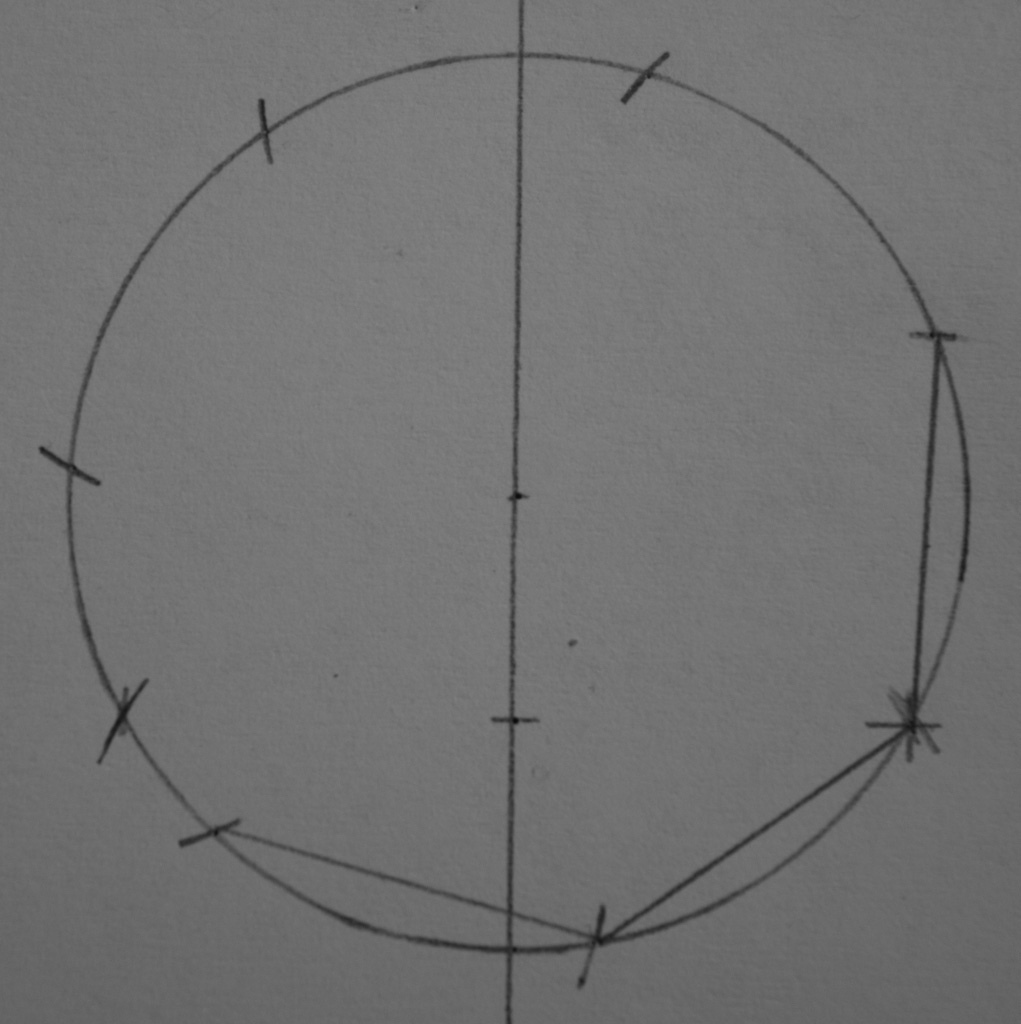
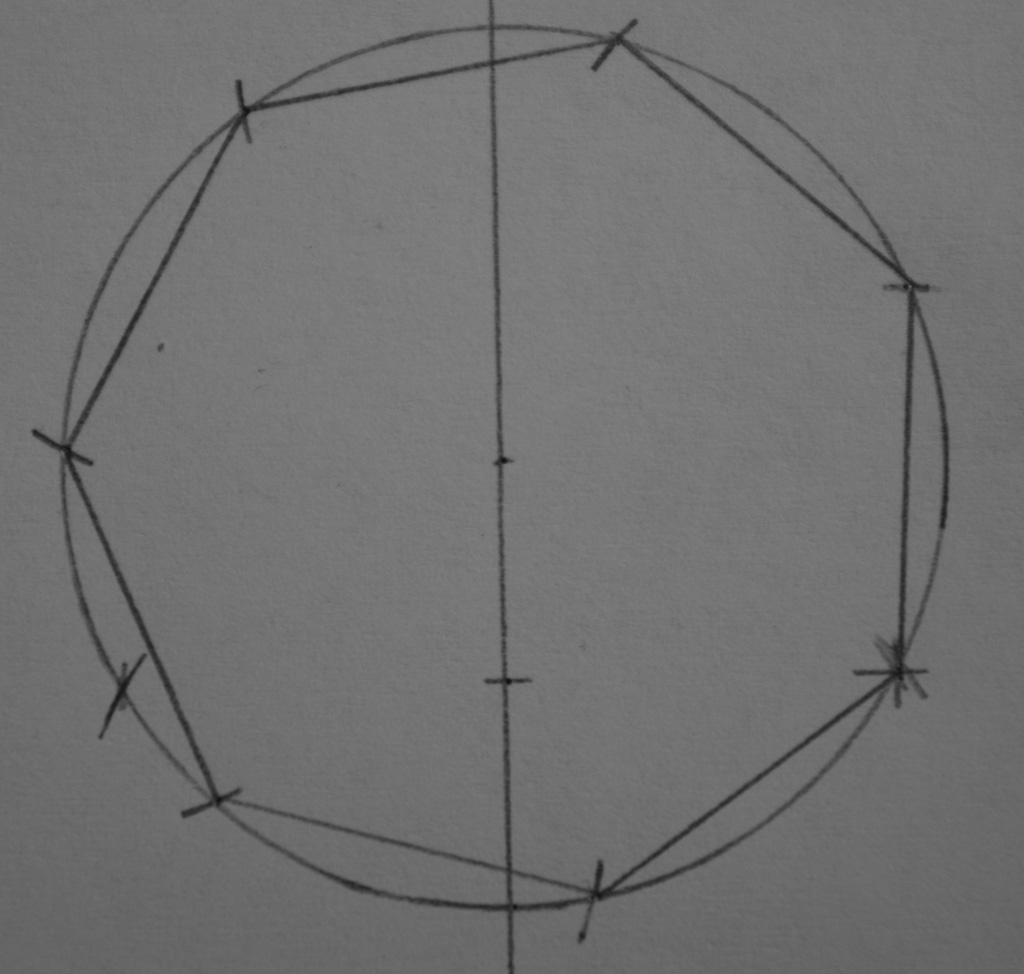
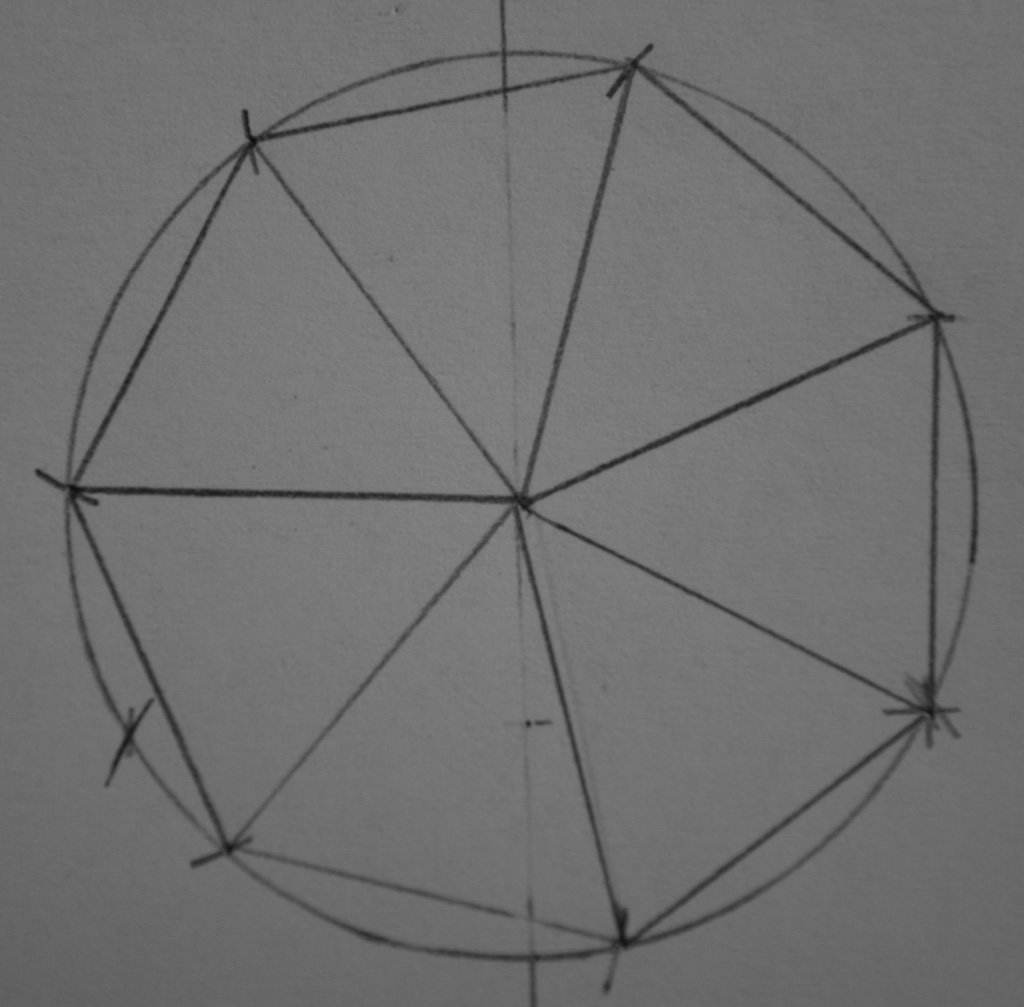
Dividing a circle
Six and seven for a rosette or hex
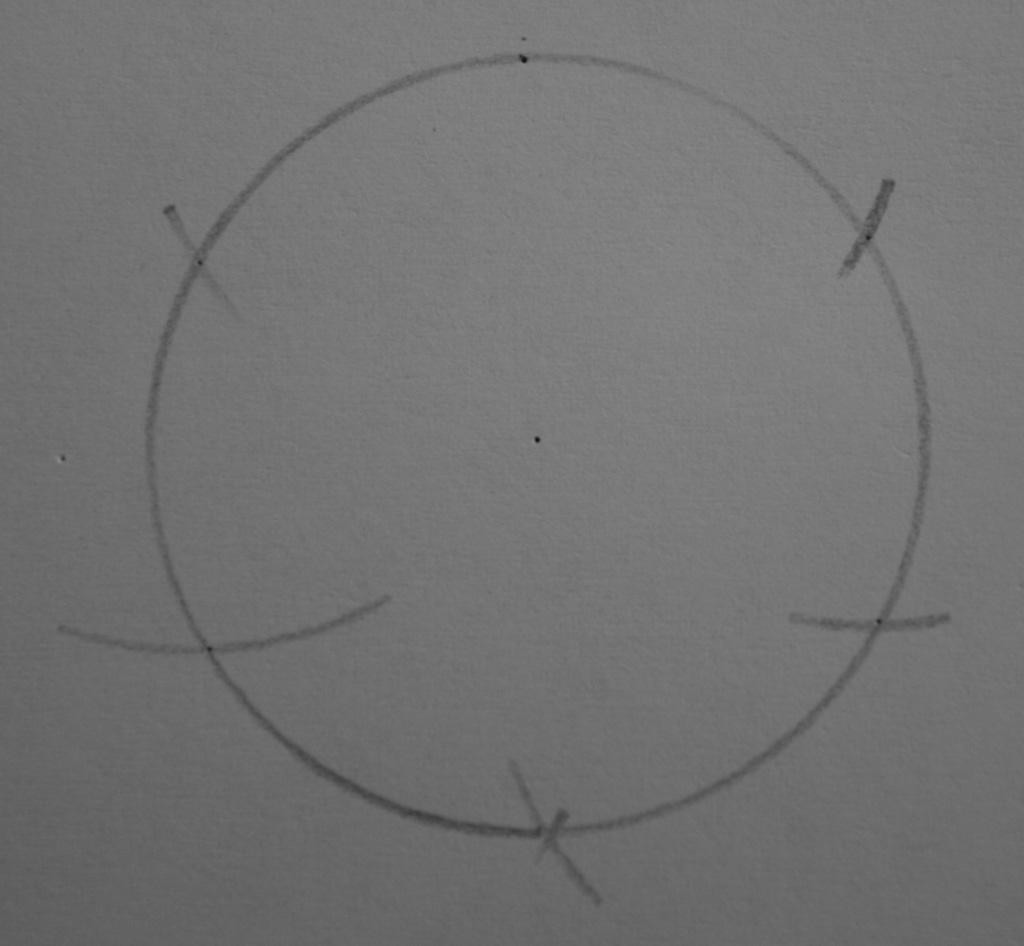
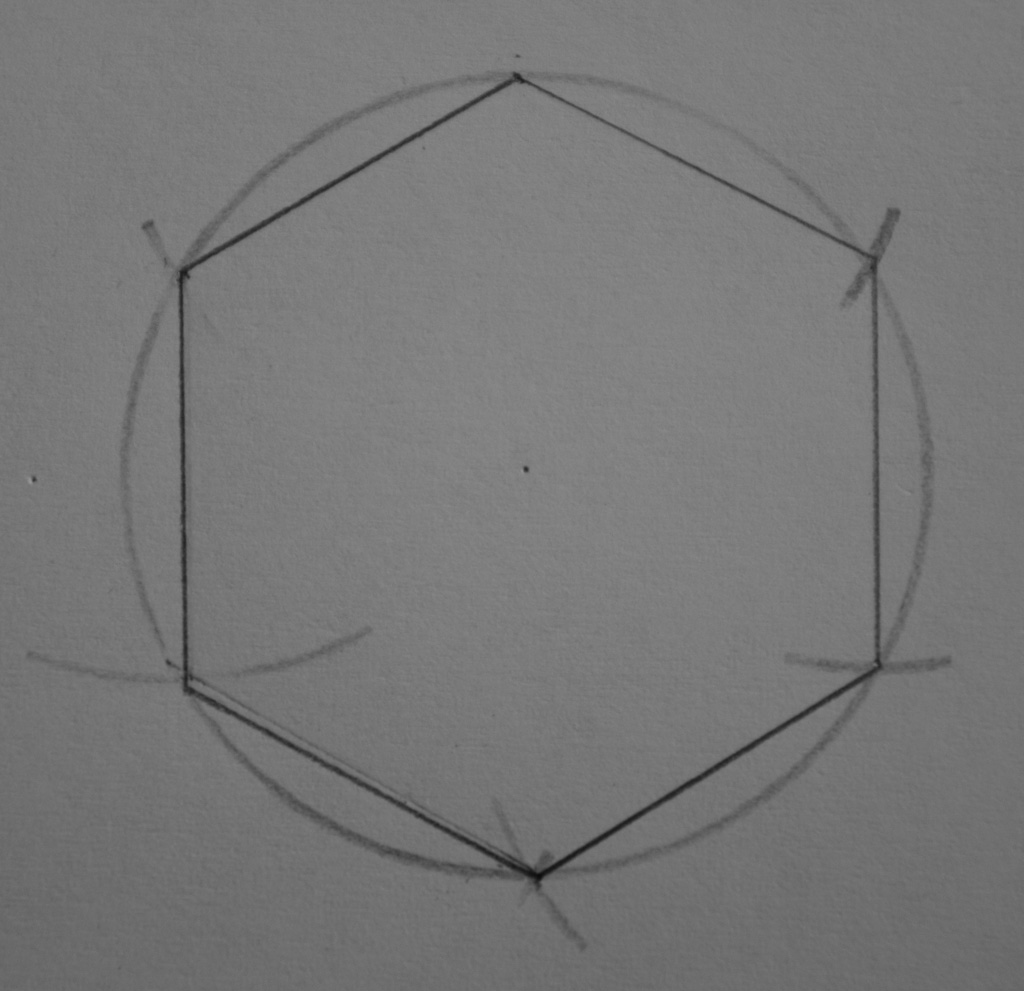
Rosette - 6

This one goes to 7
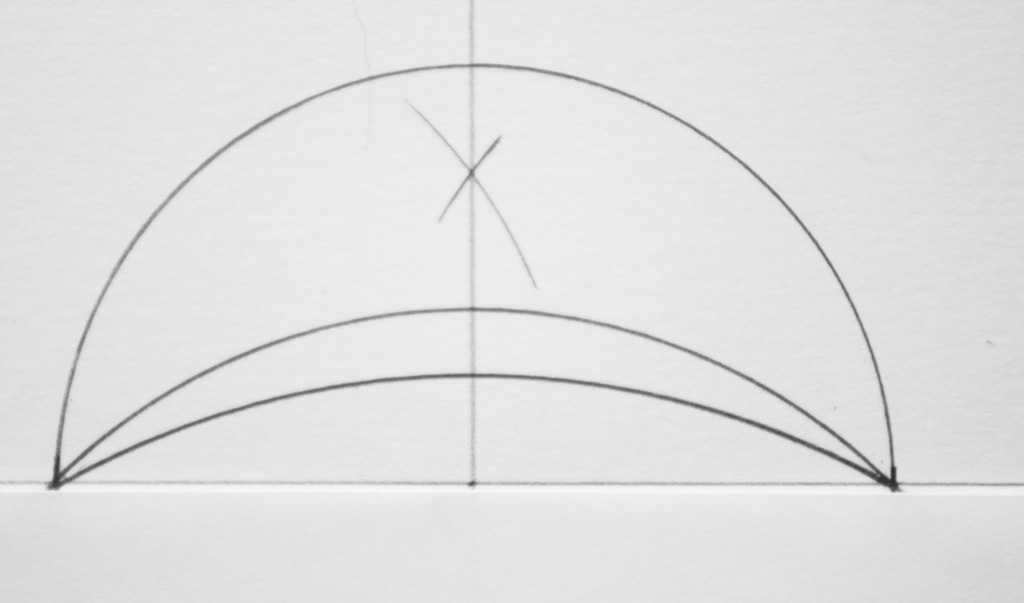
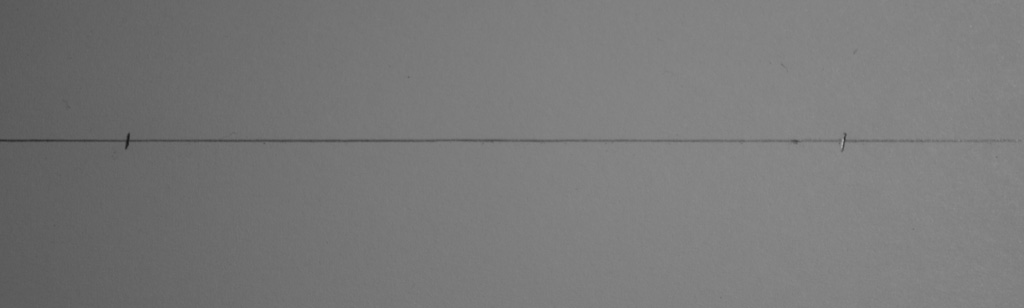
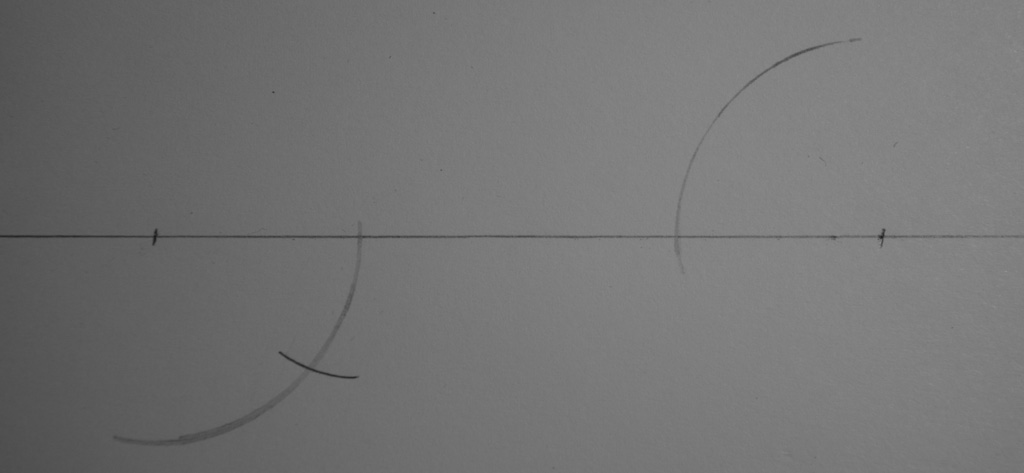
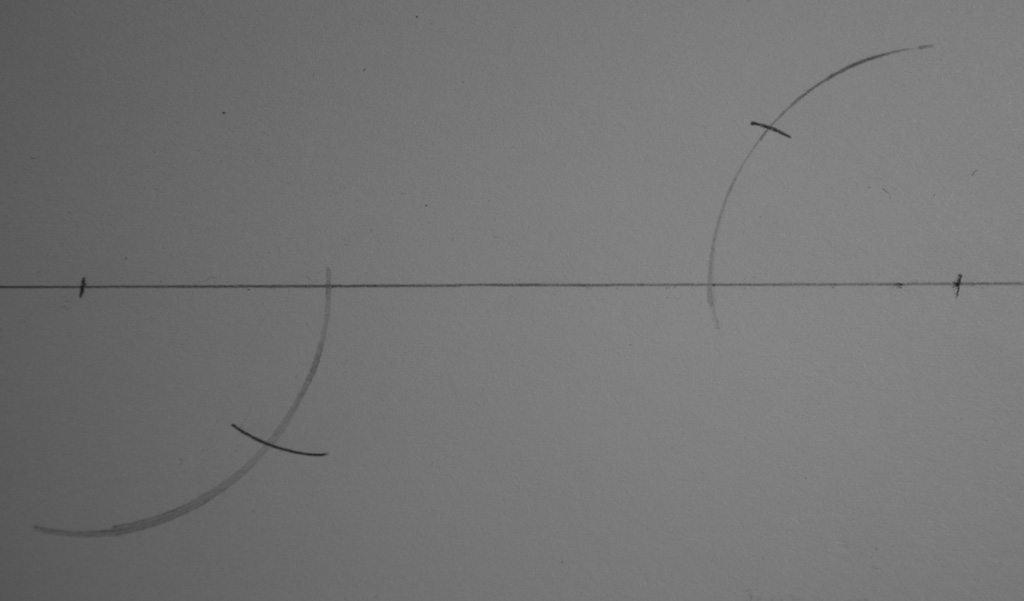
Creating Arcs from a Chord
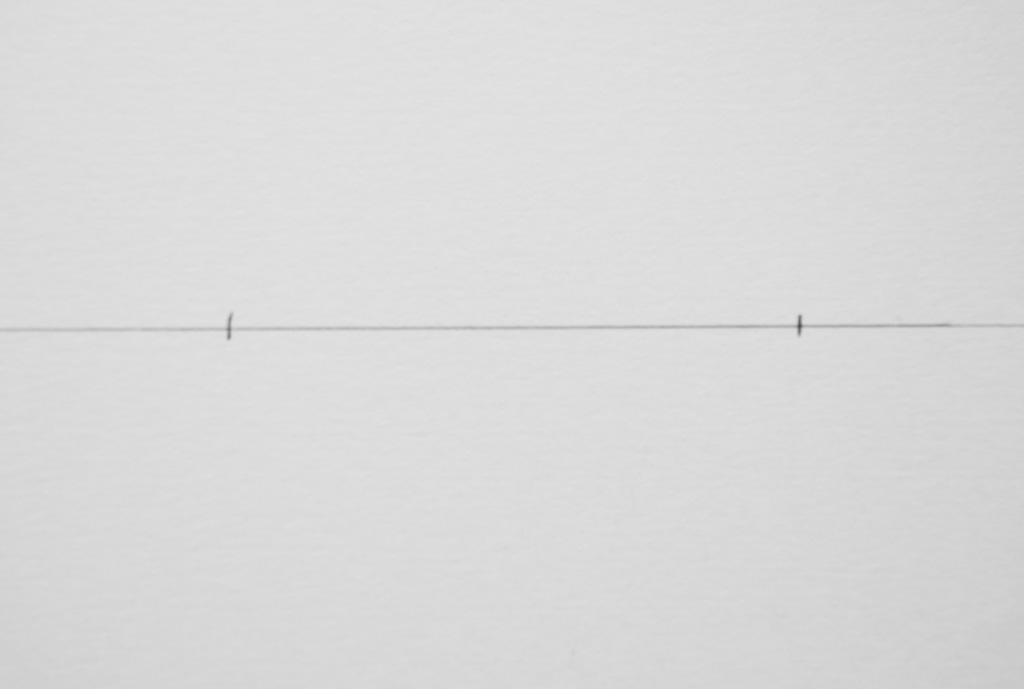
Dividing a line
Divide: initial arcs full distance. Then arbitrary choice going up, then choice within range to produce one fewer line than you need segments.
Scribing
Using Dividers
After the compass, dividers will feel simple, but there are still a few things to figure out.
Using scales on documents for measurements
Setting measurement Recording measurements for future use. Sheraton, classic orders, and proportions.
Alternatives - rulers and templates. When you need rulers. Dividing with a diagonal ruler.
Story sticks. As Lee Valley puts it on a bar gauge box, "ideal for referential woodworking".
The power of 12
Most of us have been trained to think in tens, because it makes for convenient math with decimals rather than fractions. However, that’s a recent innovation, one that costs us other flexibility. As Jon Bosak tells the story in The Old Measure:
"Multiples such as 12, 24, 60, 288… look strange to us now, but in the past these numbers were very practical because they gave the merchant, goldsmith, money-changer, and druggist so many different ways to divide this up, or, coming the other way, to assemble them.
Consider the number 60, for example. It can evenly be divided into halves, thirds, quarters, fifths, sixths, tenths, twelfths, twentieths, and thirtieths. This wealth of divisors is due to the fact that 60 contains all three of the lowest prime factors greater than one, i.e., 2, 3, and 5." (1)
Your first projects aren’t likely to need division into 60, but working with 12 is extremely convenient. (You may find you reach 60 lurking in your work eventually, not because you divide things into that many pieces, but because you further divide pieces that were already divides.) Twelve lets you easily divide by 2, 3, and 4, making it easy to base your designs on proportions.
Working with proportions lets you worry less about measurements. The metric system is built on ten. Lengths in the American customary system are built on a mix of twelve (inches in a foot) and powers of two (the half, quarter, eighth, and similar fractions of inches. When you’re working from a ruler, the more familiar system (to you) is probably the best one to use. However, if you reserve measurements for overall dimensions and use proportions for parts, you’ll spend a lot less time doing math and trying to achieve impossible precision with your rulers.
Dividing with a ruler - 12 (and 10) and 30 (and 28)
The power of 13
Fibonacci, Golden Ratio, etc.
Dreams
Sector, proportional rulers.
For More Information
By Hand & Eye, by George R. Walker and Jim Tolpin
Drawing Geometry: A Primer of Basic Forms for Artists, Designers, and Architects, by Jon Allen
The New Traditional Woodworker, by Jim Tolpin
Chip Carver’s Workbook, by Dennis Moor
The Old Measure, by Jon Bosak