The Workspace
Note
This book is not anywhere close to complete. For more on its status, please see Status of this Book. Please enjoy this preview as it grows, and if you have feedback, send it to simonstl@simonstl.com.
You need a place to work. You need a place where sawdust, shavings, glue, and the occasional loud noise are welcome. It doesn’t have to be a permanent place, and it may not be complicated.
Traditionally, woodworkers learned in established shops as apprentices, or perhaps from a relative. Dedicated workspaces make many tasks easier, but you don’t need to have a shop to get started. The key components you’ll need are:
-
You
-
Sheltered space
-
Light
-
Dry
-
Heat (or cool)
-
Cleaning supplies
-
Safety equipment
-
A work surface
-
Clamps
-
Patience
Unlike all the other projects in this book, this first project is about arranging things to make it easy for you work. The first challenge is to find or create a space where you can work comfortably.
You
If you’re not in the workspace, it won’t help you very much, unless maybe you’ve contracted someone else to build things there for you.
The workspace really needs to be built around you:
-
What you’d like to do,
-
What you’re capable of today, and
-
What you’ll be capable of in a few years.
You don’t need to be an athlete to make things out of wood, even with hand tools, but you’ll want to arrange things so that you can work easily. Heavy objects and sharp tools especially need to be in easy reach.
Your body is also the first tool you start with. As Jeff Miller puts it in The Foundations of Better Woodworking:
first and foremost among the tools you use in woodworking is your body… How you use your body is actually much more important than any of the "external" tools you might have.
…It isn’t so much that you need to bulk up your muscles or increase your endurance. But issues of balance, efficiency, alignment, proper application of force and ways to increase control are all critical to getting the most out of your body and improving the level of your craftsmanship. (29)
Start by getting yourself in the workspace. As you set it up, make sure you can find comfortable and balanced positions for working.
Note
Miller’s book makes an excellent companion to this one. It’s not written as a beginner’s book, and isn’t just about hand tools. Its regular discussions of how body position and tools interact, though, are great material for woodworkers at any level.
Shelter
Although it is possible to work outside when the weather cooperates, you’re going to need a place where you can store your tools and probably your work surfaces. Ideally, you will find a place where you can (neatly) leave your tools, and they will be ready to go the next time you need them for a project. You’ll also need a place, preferably the same place, where you can leave partially completed projects.
Note
In good weather, wooden decks can work well if you don’t mind them getting an occasional dent or cut. Railings and stairs can be great places to clamp projects. However, you will need a safe dry place for tools, parts, and projects.
What kinds of spaces might work?
- Basements
-
My unfinished basement was dark and the dehumidifier couldn’t save my tools from rust, but it was available. A finished basement could work much better.
- Kitchens
-
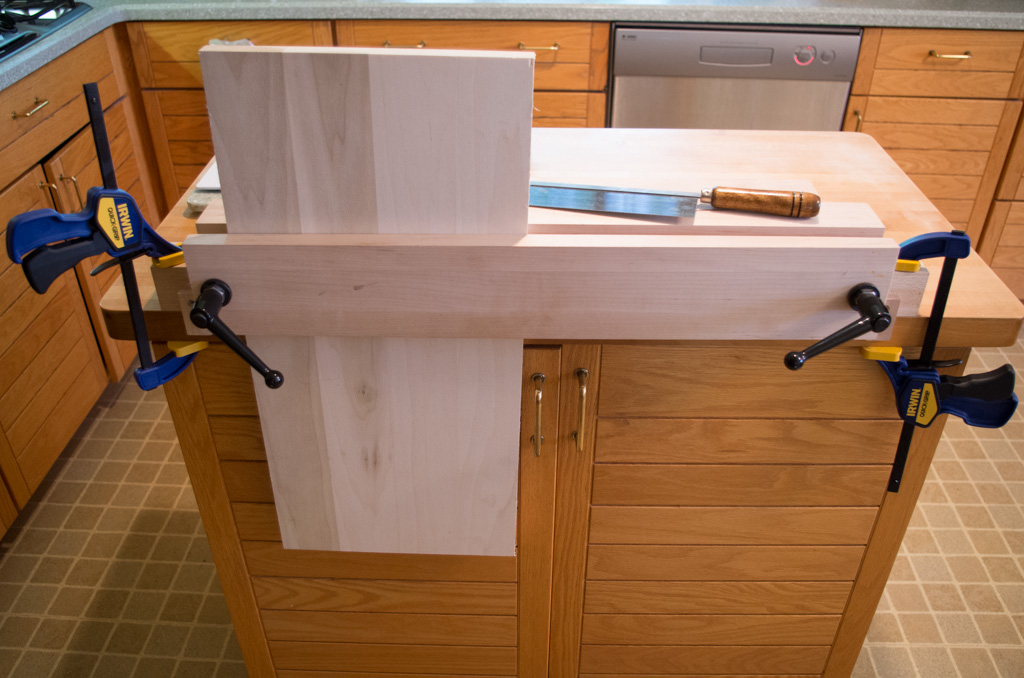
Kitchens are made for cutting, preparation, and assembly, right? A kitchen table or counter can work as shown in Figure 1-1, especially if the surface has an edge that’s good for clamping and you have some cabinet or drawer space available for storage. (Some bathrooms and laundry rooms can work for similar reasons.)
- Spare rooms
-
If you’re lucky enough to have a spare room, that might be an obvious option. If it has carpet you may want to remove it, cover it with cardboard, or resign yourself to endless vacuuming.
- Garages
-
Garages are often frozen in winter and broiling in summer. However, many woodworkers have successfully taken over their garages and made the cars wait outside. Garage doors certainly make it easier to get large parts, tools, and projects into your shop.
- Attics
-
Like garages, these are often cold in winter and hot in summer. The lighting is typically not great. However, they’re usually quiet, and may have workable space.
- Livingroom
-
I put a workbench in my living room. It’s not always convenient, but it’s hard to forget. The idea is that by having our crafts right there, we’ll do more of them.
- Shared Workshops
-
Community woodshops, whether in makerspaces, schools, cooperatives, or other settings can offer a lot of tools and experienced people. http://www.finewoodworking.com/item/106415/attack-of-the-community-woodshop includes a list of explicit community woodshops, and there are many more options. If you can find a place like this, you’ll want to make sure you schedule time and space.
The projects in this book are all fairly small. I suspect you’ll be able to complete them easily within an 4' by 4' space. You will occasionally need more space to cut an 8' board into smaller pieces. Less space could work and more space is always welcome.
Light
You probably want to be able to see what you cut. You’ll make far fewer mistakes in adequate light, and excellent light can help you evaluate your projects.
Ideally, the place where you work will have natural light on two sides, without direct sun coming in to roast or blind you. However, even if you have that, it works poorly at night. You’ll probably want to look into options for electric light, likely the first "power tool" you should be using.
Area lights brighten the space generally. You may also want to look into smaller points of task lighting so you can illuminate projects from different angles. Sometimes being able to find a shadow or imperfection makes a project much easier. When you’re first starting out, it’s nice to be able to take a close look at what you’ve done.
You can buy adjustable lamps that clamp to a surface and move to where you need the light. If you’re looking for one and you’d like to be able to see cuts and joinery more closely, consider getting one with a magnifier built into it.
Dry
Damp places, like my basement, will rust your tools quickly. You can protect your tools by coating them in oil or wax, or putting them in rust-preventing wrappers and bags, but if you can avoid storing your tools in a wet place, it’s a good idea. Clean sawdust off your tools, as it can attract and hold moisture right next to them.
Note
If you’re anywhere near saltwater, you need to be extra vigilant. Salt accelerates rust.
Wood is more tolerant of humidity, though it changes size and shape with changes in humidity. Ideally, though, you’ll build things in a shop with a humidity level similar to the place where those things will go. It helps to have a place where you can give wood time to adjust to the humidity in your shop. You should also try to keep wood off concrete floors, which can transfer water.
Heat and Cooling
Roy Underhill, of The Woodwright’s Shop, told a story of his independence from electricity. He was working in his shop in Pittsboro, NC, when the power went out. It was daytime, and he was using hand tools, so he proudly continued on without power. After all, he didn’t need it. Twenty minutes later, he stopped, as his shop had turned sweltering because the air conditioning wasn’t running. He wasn’t using power tools, but he was still relying on power.
Control over temperature helps. Cold hands can make it difficult to do fine work. Sweat pouring down your brow can make it less likely you’ll want to do any work at all. Changes in temperature and humidity can make moisture condense on your tools, first making them wet and then making them rusty.
If you can find a climate-controlled space to work in, congratulations! If not, take extra care of your tools and only work when it feels comfortable enough.
Cleaning
Your early woodworking explorations shouldn’t make that big a mess. Shavings and sawdust are easy to sweep away. If you get a lot of dust in the air, though, you may find that the dust migrates to leave a thin coat on everything in the area. Sawdust and shavings can be a fire hazard. Definitely clean up regularly!
At first, you’ll want to make sure you have a dustpan, a broom, and a smaller brush or broom you can use on a table. If you’ll be working in a carpeted area, you’ll want a vacuum or some kind of carpet sweeper.
As you get into finishing or painting your projects, you may need a place for washing off brushes and containers, and possibly solvents for cleaning them further.
Safety
Hand tools may not be quite as dangerous as power tools, but you still need to consider safety.
Hand tools are much quieter than power tools, but there will still be times when you’re banging things together. A simple pair of noise-reducing earmuffs or ear plugs will help you keep your hearing intact.
You’ll also want to protect your eyes. Safety glasses will protect you when hammering metal to metal, and will also be useful when grinding metal. Blades under tension, as in bow saws and coping saws, can also break suddenly, and hammered chisels and even awls can slip in unpredictable ways.
If things go badly, a first aid kit will usually be enough to cover the damage. You will probably get some minor cuts and bruises over time, especially when you gain the confidence to go faster. A pair of tweezers or a kit for splinters will also prove useful.
Finally, in a different safety category, a fire extinguisher is a good idea. You shouldn’t be producing any sparks in the projects in this book, but you’ll be producing shavings and sawdust that can go up quickly. Be prepared!
Patience
It may seem odd to describe a place as having patience, but if you’re working in a place that’s used for a lot of other things, you may find yourself impatient to get done with your projects.
Ideally, your workspace will just be a workspace for woodworking. If it can’t be, try to have some kind of storage that will let you put tools and incomplete projects away neatly. A large plastic bin that holds parts and supplies might make it easier to stop in the middle if it’s time to cook dinner.
As you gain experience, you’ll have a better sense of how long different tasks should take. Until then, though, you should feel welcome to go as slowly as you need to go to get it right. Rushing isn’t going to help your work.
Other people can add to or diminish patience.
If you can set up your space to encourage patience, you’ll find that going slower can often make projects finish faster.
Dreams
Wood and tool storage
Community shops, specialized shops
For More Information
The Workshop Book, Scott Landis
The Toolbox Book, Jim Tolpin